You know you need video content to grow your brand. You understand that visibility leads to engagement, and engagement leads to ROI. But the reality of setting up lighting, memorizing scripts, and being on camera every single day is exhausting.
For many content creators and business owners, the friction of video production is the biggest barrier to consistency. But what if you could produce professional, “talking head” style videos without ever showing your face or recording your voice?
CapCut’s desktop AI video maker has introduced a game-changing feature: AI Avatars. This tool allows you to generate realistic, talking characters that deliver your message with perfect lip-syncing and professional intonation. Whether you are creating tutorials, social media ads, or educational content, this feature streamlines your workflow and keeps your brand visible.
In this guide, we will break down exactly how to use the CapCut AI Avatar feature to create professional videos for free.
Get AI Content Tips in Your Inbox: Join the AI Content Creation Newsletter
Why Use AI Avatars for Your Content?
Before we dive into the “how-to,” it is important to understand the value this brings to your strategy. The digital landscape demands volume. Algorithms favor accounts that post consistently. However, high-quality video production takes time that most entrepreneurs simply don’t have.
Using a free talking AI avatar solves three major problems:
- Camera Anxiety: You don’t need to be on screen to build a personal connection.
- Production Speed: You can skip the filming, lighting, and audio recording stages entirely.
- Flexibility: You can quickly edit scripts and regenerate videos without having to reshoot a single frame.
Getting Started with the CapCut AI Video Maker
To access this feature, you will need to use the desktop browser version of CapCut. While the mobile app is powerful, the desktop browser offers the specific AI tools we are focusing on today.
Step 1: Access the Tool
Navigate to the CapCut website and log in to your account. If you don’t have one, creating an account is free and essential for saving your projects.
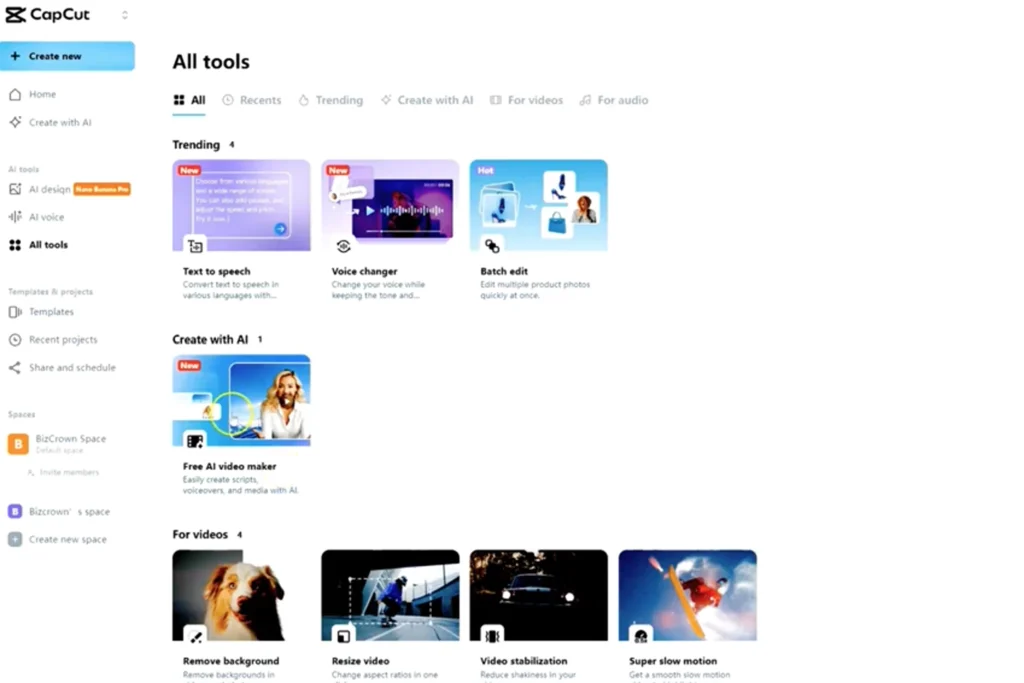
Once logged in, look for the AI Tools section on the dashboard. Click on Free AI video maker. This will take you to a workspace displaying various generative tools. Select Avatar Video to open the specific interface for creating your spokesperson.
Step 2: Select Your Avatar
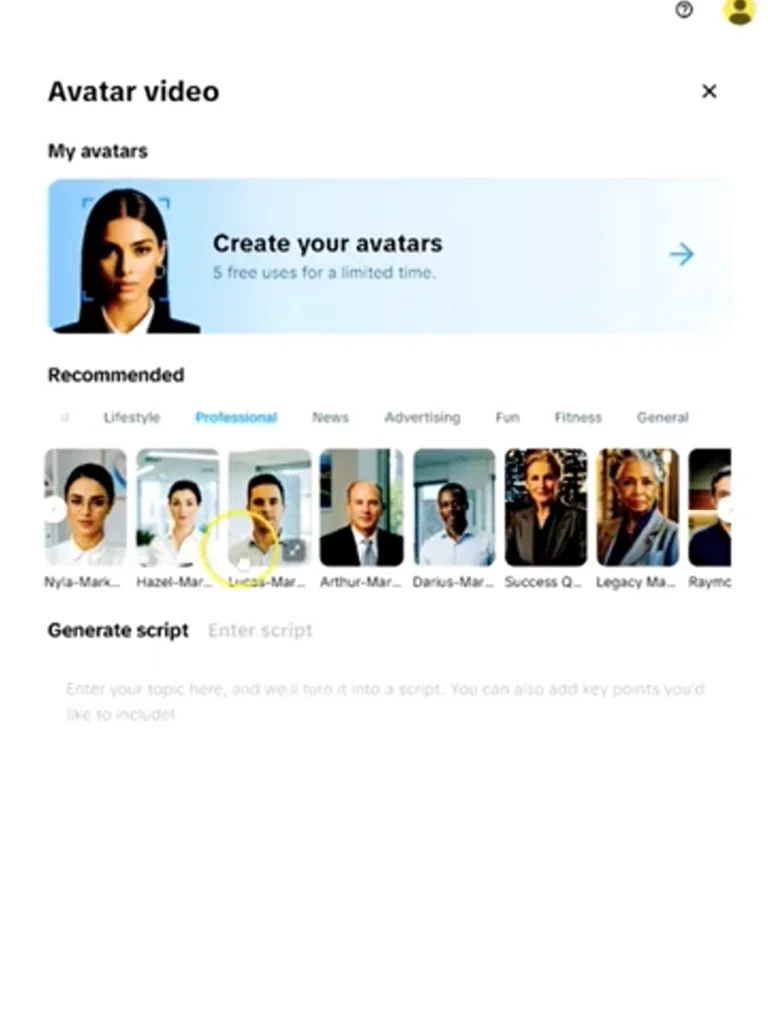
On the right-hand side of the screen, you will see the avatar selection panel. CapCut has categorized these digital humans to fit various niches, ensuring you can find a look that aligns with your brand identity.
Current categories include:
- Professional: Great for corporate updates, business tips, and formal announcements.
- Lifestyle & Fashion: Ideal for influencers, clothing brands, and casual content.
- Educational: Perfect for teachers, course creators, and how-to guides.
- Fitness & Sports: Suited for health tips and workout introductions.
Pro Tip: Choose an avatar that mirrors the tone of your message. If you are delivering a quarterly business update, a “Professional” avatar in a suit conveys authority. If you are sharing a fun life hack, a “Lifestyle” avatar feels more relatable.
Step 3: Input Your Script
You have two options for your content:
- Generate Script: If you are stuck on what to say, you can use CapCut’s AI to help write the script for you.
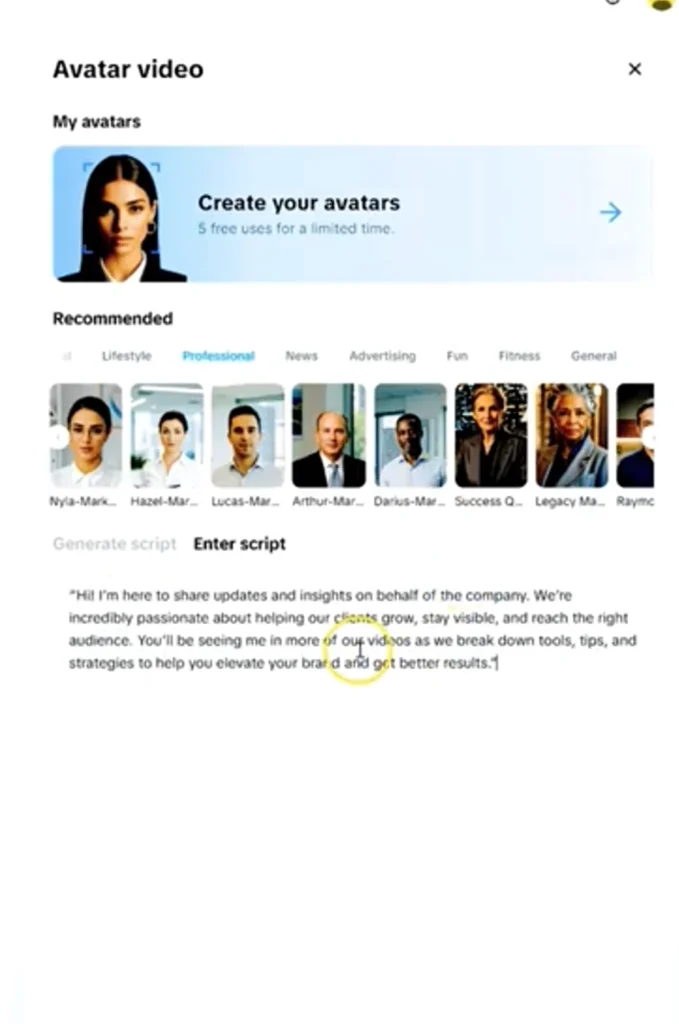
- Enter Script: If you already have your messaging ready, simply copy and paste it into the text box.
For this tutorial, let’s assume you have a pre-written script about helping clients grow their visibility. Paste your text into the script box. You will see the text populate on the timeline.
Step 4: Choose the Voice
This is a critical step. You want a voice that matches the physical appearance of the avatar and the sentiment of your text.
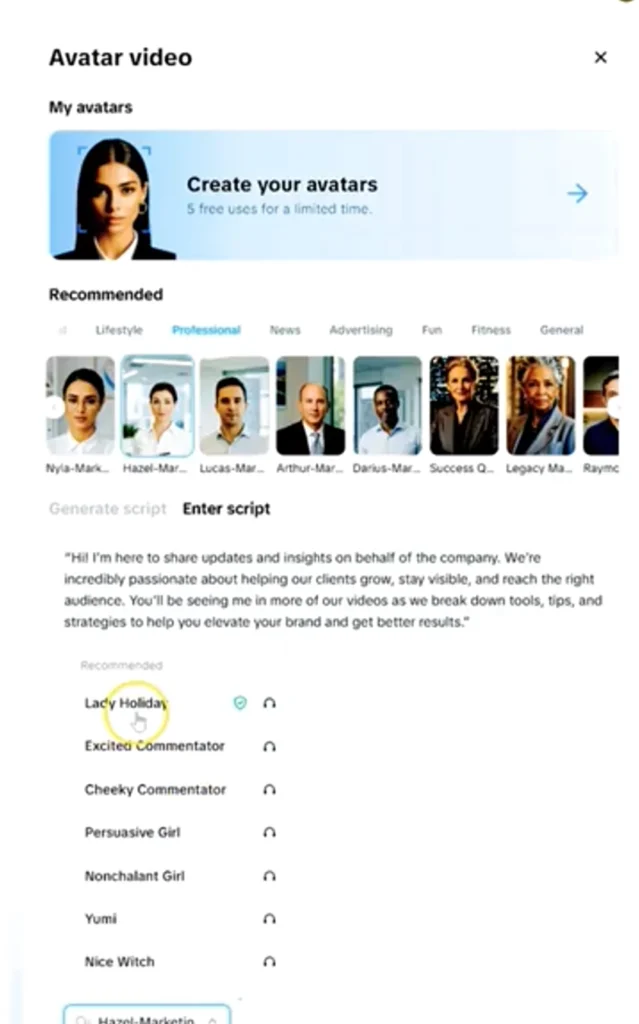
When you select an avatar, it comes with a default voice (for example, “Hazel” or “Lady Holiday”). However, you can click on the voice settings to preview different options. You might test “Persuasive Girl” for a marketing ad or “Excited Commentator” for a high-energy announcement.
Note on Voice Matching: During testing, you may notice that some avatars are locked to specific voices to ensure the most realistic lip-syncing. If you select a specific character, the system might default to their specific voice (like the “Lady Holiday” voice) to ensure the mouth movements are accurate. Always preview the audio to ensure it sounds natural.
Step 5: Generate and Render
Once you are happy with the script and the character, click the Generate or Play button. The system will begin processing the video.
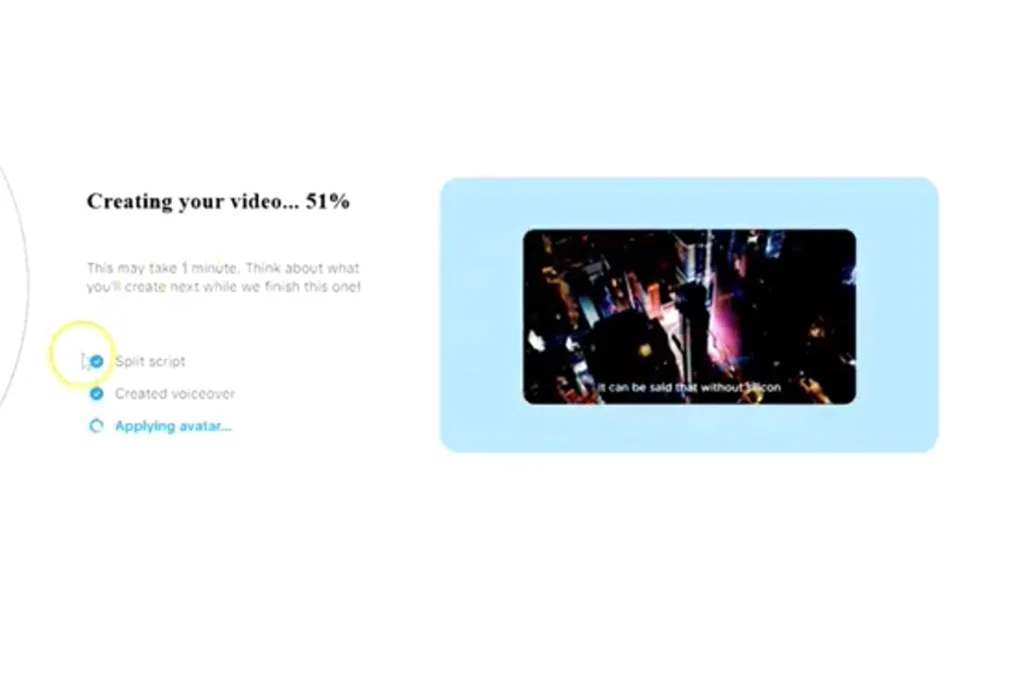
You will see a progress bar indicating three stages:
- Splitting the script.
- Creating the voiceover.
- Applying the avatar.
This transparency helps you understand exactly how long the render will take. Generally, it is a fast process, even for longer scripts.
Refining Your Video
Once the video renders, you will see your avatar speaking your script on the canvas. This is where the magic happens. The mouth movements on these AI avatars are exceptionally high quality. They include natural pauses, hand gestures, and realistic facial expressions that rival paid tools.
Editing the Script
Did you spot a typo? Or perhaps you want to change the intro? You can edit the text directly in the script box on the left.
As soon as you change the text, the timeline updates. You can move segments of the script around, and the video will adjust accordingly. This flexibility allows you to refine the flow of information without starting over.
Swapping Avatars in Scenes
If you decide halfway through that you want a different look, you don’t need to create a new project. Go to the Scenes tab. Here, you can select a different avatar and click Replace.
The system will prompt you that it needs to regenerate the voiceover for all scenes. Click Continue, and within a minute, your new avatar will deliver the same script. This is incredibly useful for A/B testing different characters to see which one resonates best with your audience.
Finalizing and Exporting
You have two choices once your AI avatar video is ready:
- Export Immediately: If you just needed a simple talking head video, you can export it directly to your computer.
- Edit More: This is where CapCut shines. By clicking Edit More, you can take this AI-generated clip into the main CapCut timeline.
In the full editor, you can add background music, text overlays, b-roll footage, and transitions. This transforms a simple AI video into a fully produced piece of content ready for YouTube, TikTok, or Instagram.
Start Creating Today
The barrier to entry for video creation has never been lower. With the CapCut AI avatar generator, you can produce consistent, professional content that builds trust and authority—all for free.
Whether you are a marketer looking to increase ROI or a business owner wanting to stay visible, this tool allows you to scale your video efforts without the burnout.
Ready to try it out? Head over to the desktop version of CapCut and create your first avatar video today.
Check out our Marketing guides for more helpful topics and for more social media tips and digital app tips, join our newsletter and follow us on social media and YouTube. Contact us for Digital Marketing or Social Media support and assistance
Dr. Mayo Adegbuyi is the president of BizCrown Media, where he assists businesses with digital marketing strategies and services to grow their awareness and revenue. He holds a Bachelor's in Fine Arts (Graphic Design), a Master's in Integrated Marketing Communications, and a Doctorate in Business Administration. With over 4 million YouTube views and extensive leadership experience, Dr. Mayo blends creativity, strategic insight, and cutting-edge techniques to accomplish business goals.